 |
What's
a door ... exactly?
You should now be able to make basic shapes and structures, and how to
place them together. You also know how to add items like lights, monsters,
weapons, ammo, etc. Don't underestimate what you know at this point. You
now have most of the essential skills, these are the ones you need to
develop. Don't be fooled into thinking that good levels are based on their
fancy doors, nasty traps, or intricate teleporters. Good levels are 99%
good architecture, texturing, lighting and item/monster placement.
Before we start into making more complex things you
need to know how things like doors and lifts work. You can think of
the quake world as two types of things: Brushes and Entities. Brushes
are solid pieces in the level - things that the player can't manipulate
or use. Entities are the non-solid items and things the players can
pick up. An entity is any item in the game that requires a set of instruction
on how it operates. Health, for example, adds 25 to the players current
health, a monster is a entity with a complex set of code by which it
hunts down the player. These instruction are all kept in QuakeC. Things
like doors, elevators, moving platforms etc.. are all a combination
of these two things - they are solid brushes which operate by a set
of instructions. (Actually, this is all a lie. Everything in Quake is
an entity. Regular brushes which don't do anything are 'world' entities.)
By taking
a brush and tying it to an entity you give the brush a set
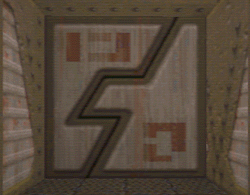
of commands by which to function. Tying a brush to "func_door" turns
the brush into a door which will open when you walk near it. Like other
entities, brushes have a number of different options you can change
to make them behave differently.
|


|
Editing
Entity Properties
Every entity and object has properties which you can edit. The
properties can be accesed by right-clicking on the selected object/entity,
and selecting "properties" from the pop up menu. You should now see the
properties window. The properties window is the same for all entities,
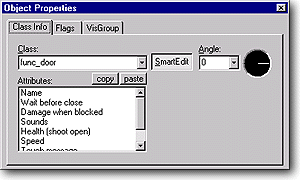
some just have different options. Class
Info Tab 
Class: picks the type of Entity.
Attributes: Nearly every entity has attributes which can be altered
or selected. For a door, there are 8 standard attributes you can change,
name, wait, and damage, etc. Your first door won't need a name, name
applies to any item that is triggered by something else.
Setting Angle's: In the angle section, you'll see a drop down menu,
and a dial. The first thing you have to do to understand these, is to
think only of the top view of your map. The drop down menu controls
UP, and DOWN. Anything that will be rising, or dropping form the "top
view" will be set by this. The dial controls which way things move in
the top view, or the direction they face in the case of monsters and
players. Select your "player start" and right click on it and pick "properties"
from the menu ( [Alt]+[Enter] also works) You'll get the Object Properties
box. Now whichever way the needle points, is the same direction that
your player will be facing when he spawns, so if you've been spawning
facing the wall every time, you can change that here. Close the properties,
and it will take effect.
Flags Tab

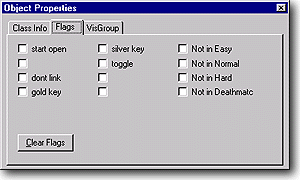
Just like "class info" nearly every entity has flags which
can be selected. For Monsters you can choose whether they will appear
in easy, normal, hard, etc. In the case of a walltorch, there are no
flags to alter.
VisGroups
Tab 
Don't worry about this part for now, you'll find VisGroups
talked about later in the section on advanced editing. This will simply
allow you to place the selected object into a particular VisGroup.
|

!
If you tie a brush to an entity and then want to turn it back into a
regular brush again, just click to the while the brush is selected and
the brush will go back to being normal. |
Creating
a door
Let's go back to the old map we had of the hallway and the two rooms.
Now, we'll add a door. Lets drop the grid size down to 16 so that we can
put the door exactly where we want it. First we create the brush the size
and shape we want the door to be, make it the same width as the interior
of the hallway, and 32 wide (2 squares in this case), and the same height
as the interior of the hallway. Now place it one grid space into the hallway
so that it will look more realistic when it's done  .
Select that brush, and click on the button [to Entity]. You then
get the entity properties dialogue box with a number of options. Change
the class to func_door, it should be the default.. .
Select that brush, and click on the button [to Entity]. You then
get the entity properties dialogue box with a number of options. Change
the class to func_door, it should be the default.. Let's
leave the attributes alone for now, you do need to set the angle. We
want this door to open "UP" so click the drop down menu in the Angle
section, and pick "UP". Lets leave the flags tab alone for this door,
or it may not open right yet. Close the Object Properties box now.
This door is done,
you can compile your level and try it out.
You now have a basic understanding of how brushes can be tied to entities
to control the way they behave. The next step you'll learn how to create
more complex target/trigger systems...
|